- Item #
- Y4988
Recommended Accessories
Product Information
Details
Asphalt Anchors
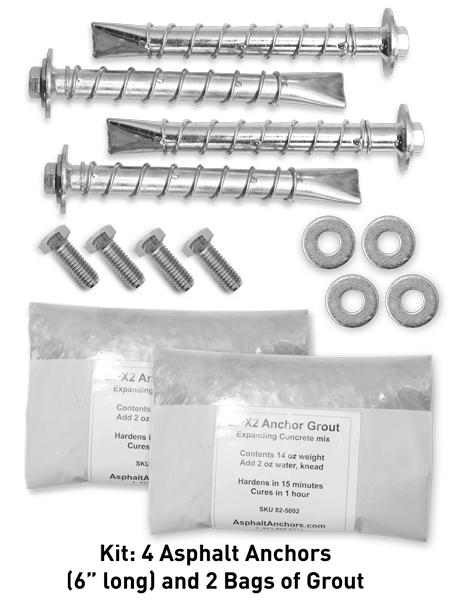
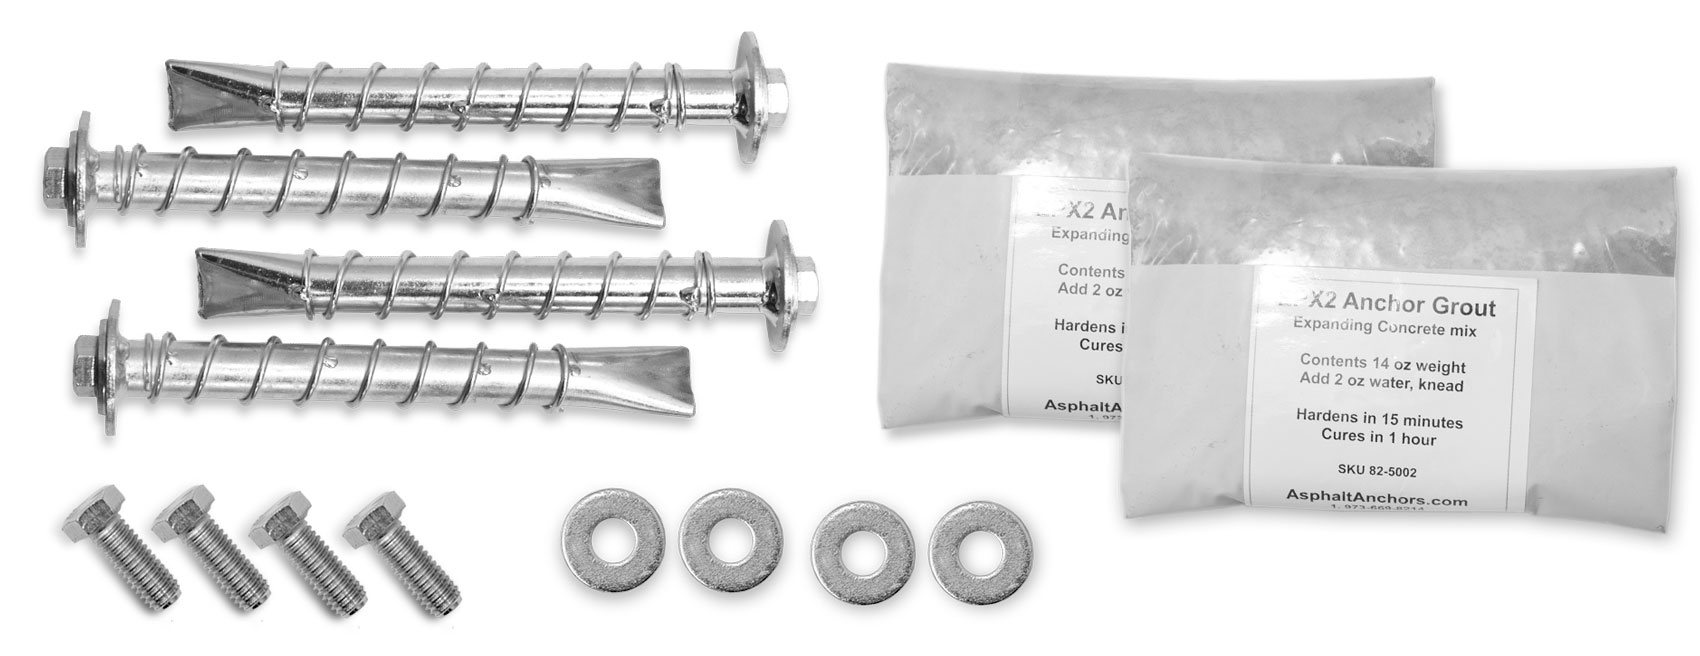
This asphalt anchor kit comprises of (4) SP10-38 anchors and (2) EPX2 grout bags everything needed to secure the 4 anchors to asphalt. The SP10-38 anchors are 6" long and 5/8" in diameter, with a 3/8"-16 female thread. The anchor is bonded to the asphalt using a special grout EPX2.
Force Rating: The resistance of the installed anchors to extraction depends greatly on the nature of the asphalt and the gravel below it. The SP10-38 anchor is pull-rated for 1,500 lb. At ground level, the anchors can resist 1,000 lb. of shear force.
The anchors are also rated for rotary torque; this torque is exerted when tightening the attaching bolt. This torque generates an internal pull stress on the thread, as well as a rotating force on the anchor against the asphalt. The SP10-38 is rated for 200 in-lb. torque.
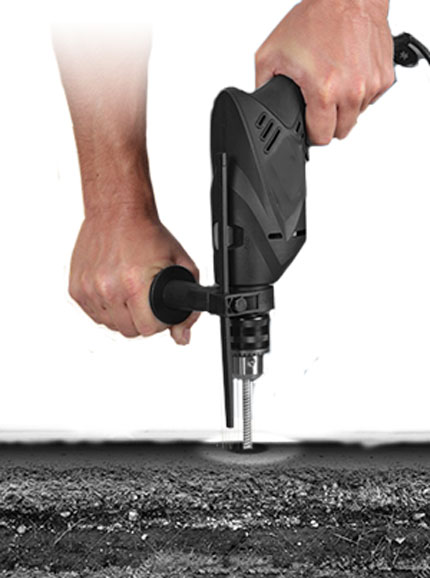
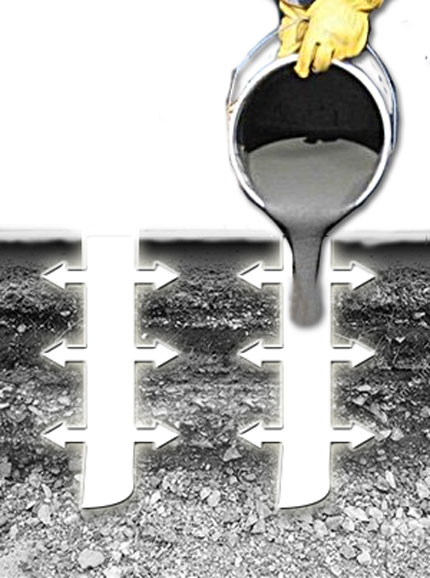
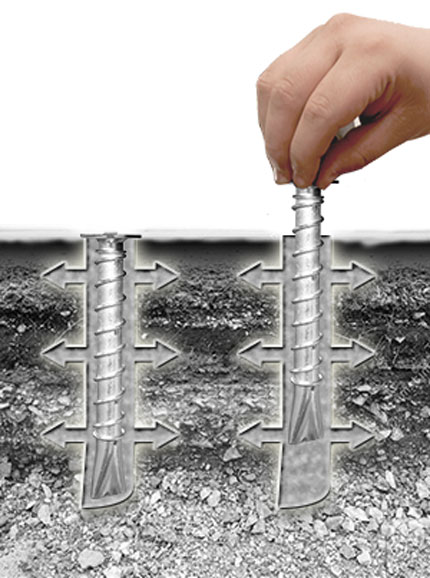
The installation requires drilling a 7/8" hole, 6" deep, into the asphalt and the gravel below it. The grout is supplied as a cement powder. It requires the addition of water to activate it. The hole is filled with the grout and the anchor is dropped in. The anchor is ready for use in 15 minutes .
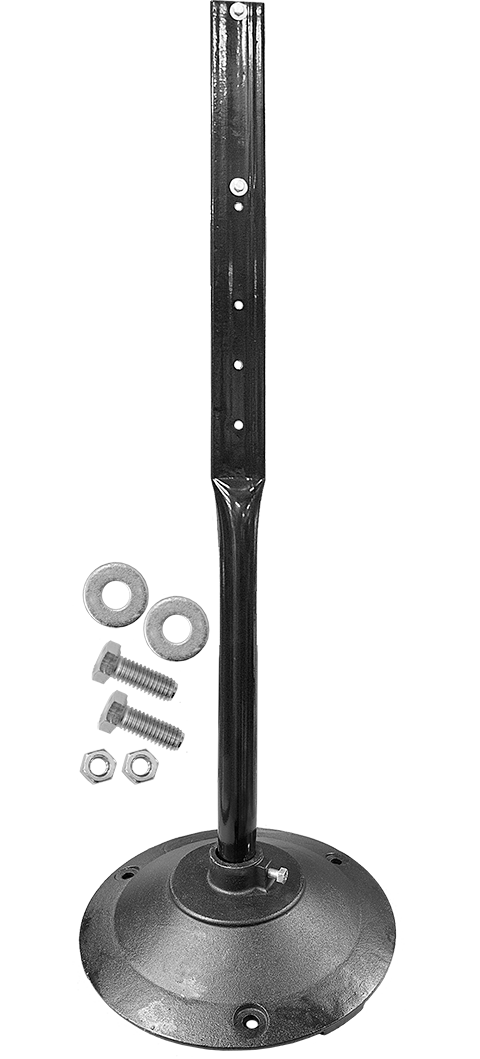
Asphalt Anchor Kit includes:
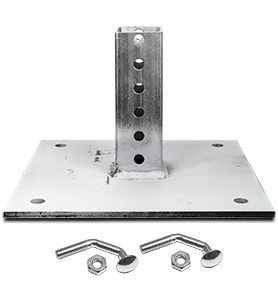
- 4 - 6″ long Asphalt Anchors
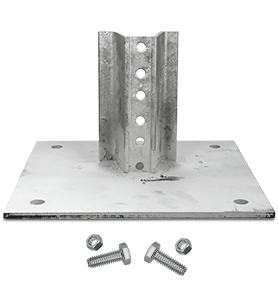
- 4 - ⅜″ x 1″ long -full thread- bolts
- 4 - Washers
- 2 - Bags of anchor grout (14oz)
Our anchors have been specially designed to overcome the asphalt's weakness in 2 ways:
- Anchors are unusually long.
- They bond with a hard grout that fills the crevices in the asphalt and the gravel below it, to distribute the forces over a large area.
Key Benefits:
- Large washer prevents anchor from dropping below the surface, protects the thread from grout overflow, prevents static pull as the bolt is tightened, covers up any irregularities in the asphalt hole.
- Spiral bonds with grout.
- Sealed bottom prevents grout from reaching the internal thread. The embedded grout then seals the anchor interior from water seepage.
Asphalt Anchor Specs
| Details | Specifications |
|---|---|
| Drill Depth | 6″ |
| Drill Diameter (min) | ⅞″ |
| Anchors per EPX2 bag | 2 |
| Grout Weight (powder), oz | 4 |
| Grout Volume (cured), cc | 60 |
| Anchor Pull Rating | 1,500 lb. |
| Anchor Shear Rating | 1,000 lb. |
| Bolt Torque, lb.-in. | 200 lb.-in. |
| Anchor Length | 6⅛″ |
| Anchor Head Diameter | 1⅜″ |
| Anchor Head Depth | 0.080″ |
Required Supplies and Tools for Installation
- Water
- Measuring cup for water
- ⅞″ masonry drill bit
- Hammer-drill
- Hammer
- Wrench or socket for bolts
- Vacuum cleaner or blower
Installation Steps: Prepping and Pouring the Grout
- Place the base where it needs to be and mark all four of the mounting holes.
- Remove the base and drill a ⅞″ diameter x 6″ deep hole for each of the 4 anchors.
- Clean the hole and the immediate area around it with compressed air or a blower.
- Prior to the activation of the grout, make sure that you have the anchors on hand. Do not separate the bolts from the anchors. Note that the EPX2 is fast curing; you have less than 10 minutes handling time.
- With the zipper on top, carefully open the bag in the middle of the zipper. Do not press on the bag as it will send a cloud of dust which should be avoided.
- Slowly add 4 oz. of water. There is large variability in the required amount, depending on the water content of the grout as provided in the bag. The end consistency of the mixture should be syrup-like. Note that the transition from dry powder to liquid is quite abrupt.
- If too much water is added, the consistency will be too liquid, and the grout will require much longer to cure and may not reach full strength. If an inadequate amount is applied, there will be lumps in the mixture and it will clog the top of the hole in the ground and the grout will not flow to the full length of the hole. The pull resistance will be severely reduced.
- Roll the top section of the bag that has no mixture to remove trapped air from the bag, then carefully zip the bag closed.
- Knead the mixture for 2 minutes until all the powder is dissolved and no lumps are present. As you knead, rotate the bag 90 degrees at a time, knead and rotate again.
- If more water is required, add one tablespoon at a time.
- Slowly pour the mixture into the hole from a corner of the bag.
- Make sure that the grout reaches the very top of the hole, even a little above it. Failure to fill to the top will greatly weaken the bond between the anchor and the asphalt.
Insertion of the Anchors
- Push the anchor into the hole. When the anchor head is about 2″ from the asphalt, inspect the level of the grout in the hole. If the level is below the surface, top up the grout without pulling out the anchor out.
- Push the anchor in until its head is flush with the surface.
- Immediately wash the area around the anchor to remove unsightly grout before it cures. You may also scrape the excess using a trowel or a piece of cardboard.
- The time for full cure of the installation varies with the mixture, temperature and humidity. Allow 1-2 hours before exerting a pull load (250 lbs. or more) on the anchors.
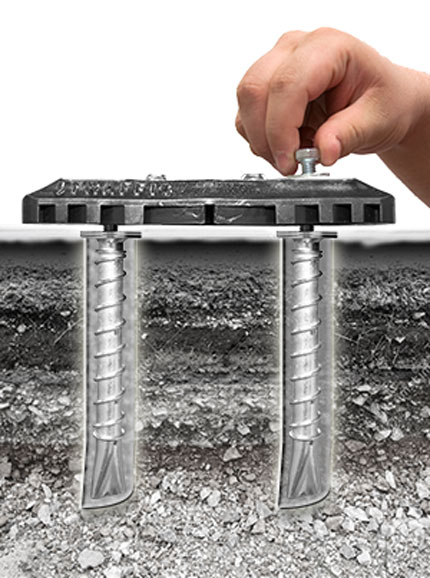
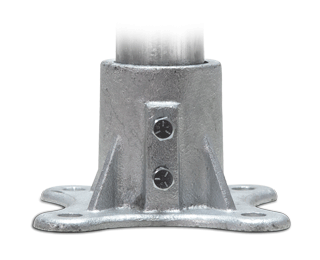
Attaching the Base to the Anchors
- Remove the bolt and washer from the anchor.
- Place the base to attach making sure that it is flat and in contact with the head of the anchor.
- Insert the washer and the bolts and tighten. Do not exceed the 200 lb-in torque allowed. Do not use an impact wrench.