Frequently Purchased Together
Product Information
Details
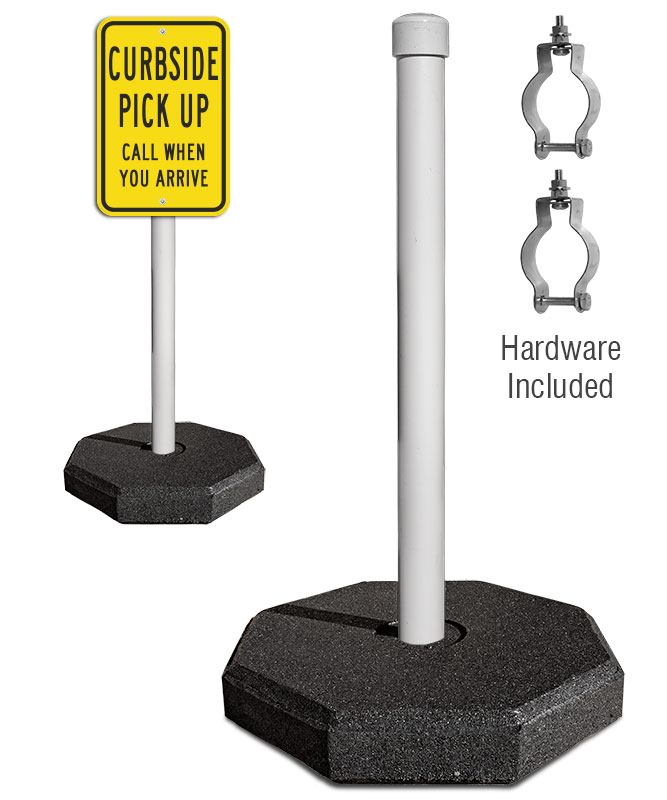
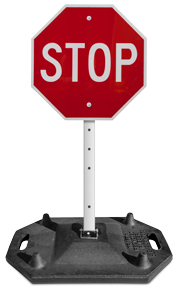
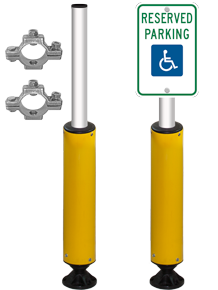
30 LBS. OCTAGON BASE
SafetySign.com’s 30 lb. Rubber Portable Sign Stand is a great choice for those that need something more versatile than a permanent sign post. At 30 lbs., this sign stand is heavy enough to stay in place, but light enough to easily transport around a facility, parking lot, or side walk.
Base Configuration / Installation & Mounting Hardware
- Made from 95% recycled rubber tires and 5% polyurethane binder.
- Mount Signs with 2 (3/8" dia) holes, 1 top and 1 bottom.
- White PVC Post: 1-7/8" dia (supplied with white cap)
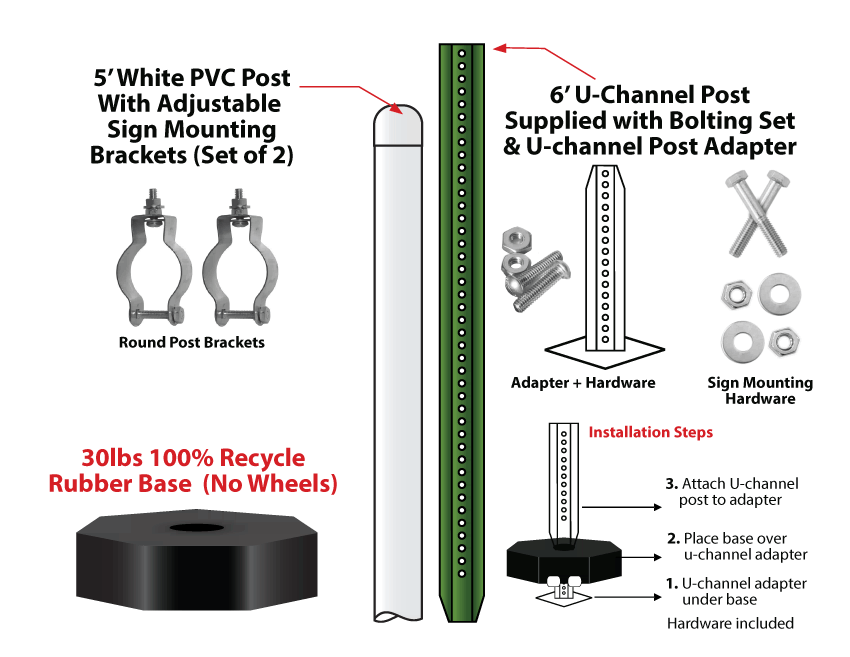
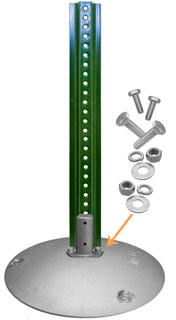
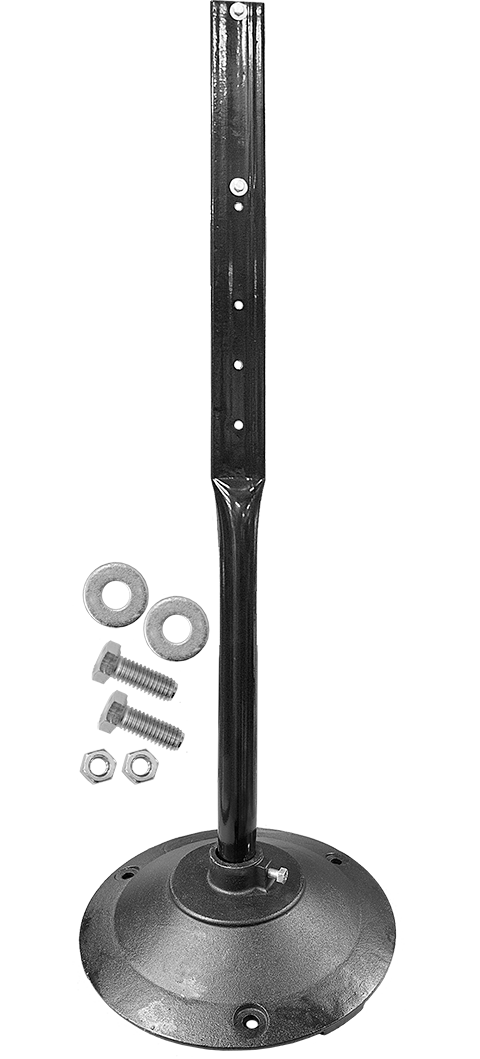
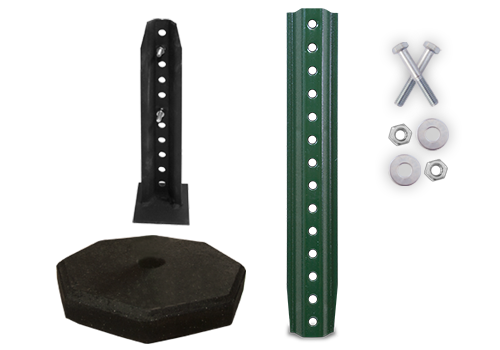
Octagon Rubber Base + U-Channel Assembly
OCTAGON BASE 30 and 60 Lbs. Assembly Instructions
- Kit Includes
- Octagon Rubber Base
- 6ft Green Enamel-Coated U-Channel Post 1.12 lbs./ft.
- U-Channel Adapter
- Set of sign mounting hardware
- Set of post + adapter mounting hardware
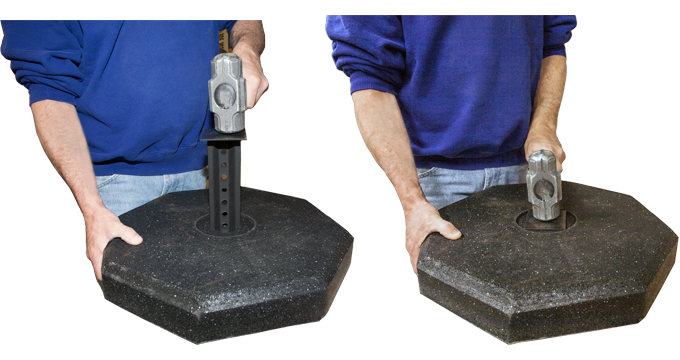
- Step 1
- Turn base upside down.
- Step 2
- Proceed by inserting U-Channel adapter through the bottom of the base opening
- Step 3
- Hammer down adapter until it is flush with the bottom of the base.
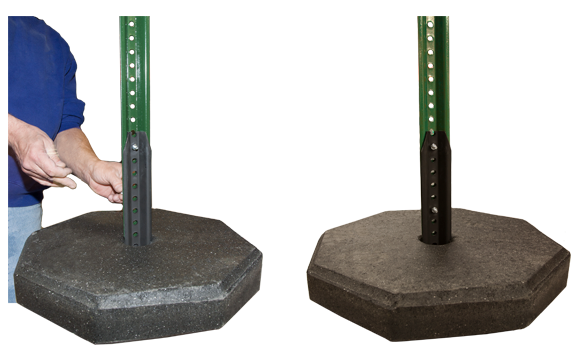
- Step 4
- Turn base over and attach U-channel post to adapter using mounting hardware supplied with adapter
-
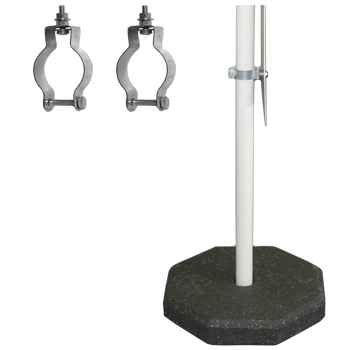
- Kit Includes
- Octagon Rubber Base
- 5ft. White PVC Post
- Sign mounting brackets (with hardware included)
-
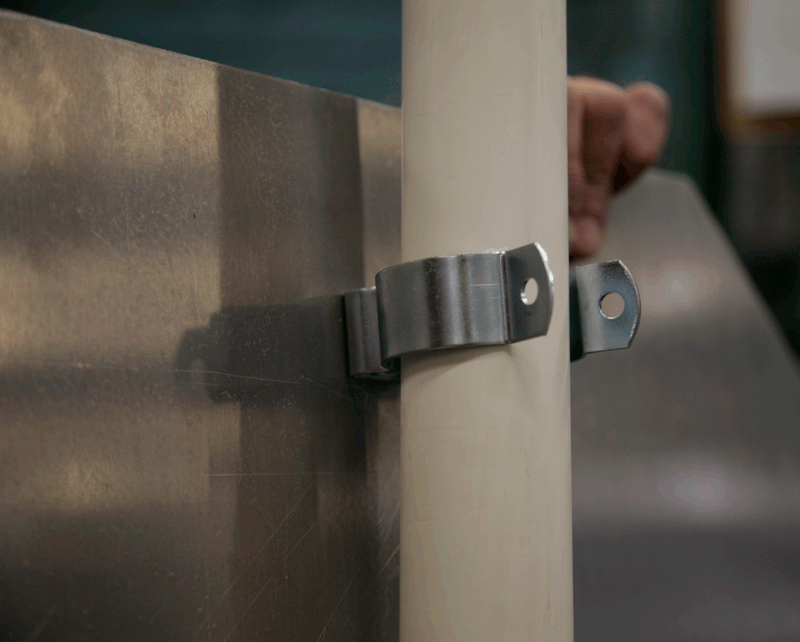
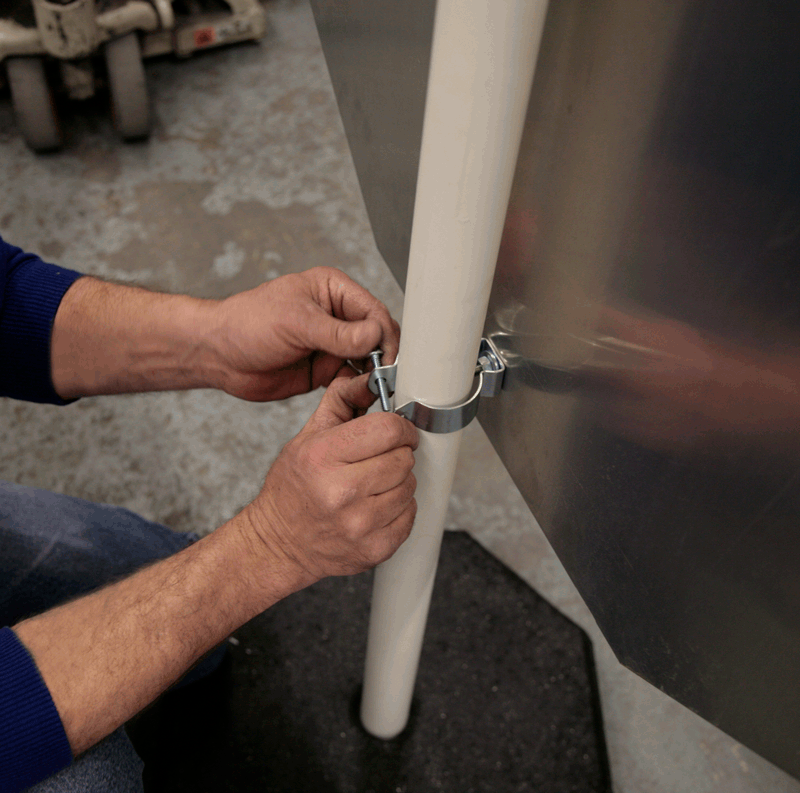
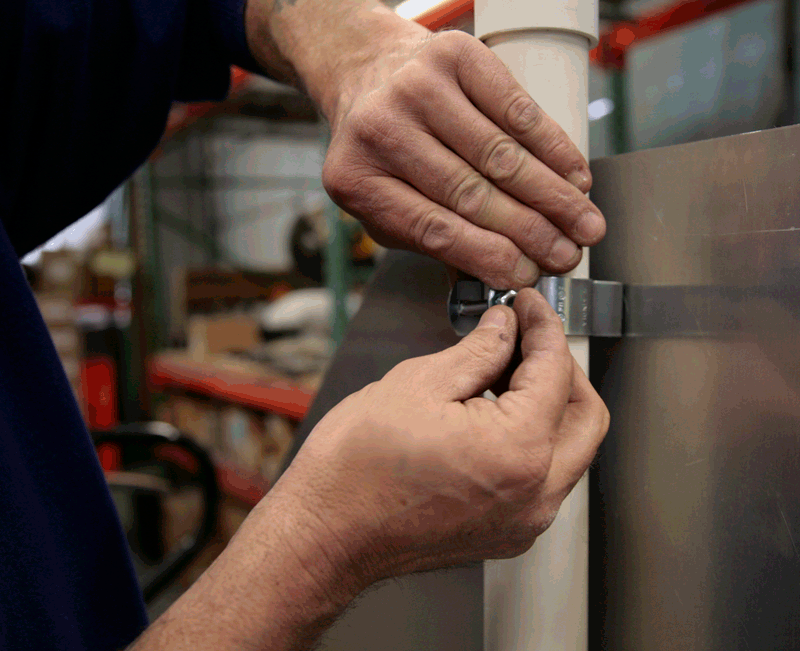
- Step 1
- Insert PVC post into base opening. Make sure post goes as far in as possible, preferably flush with the bottom of the base.
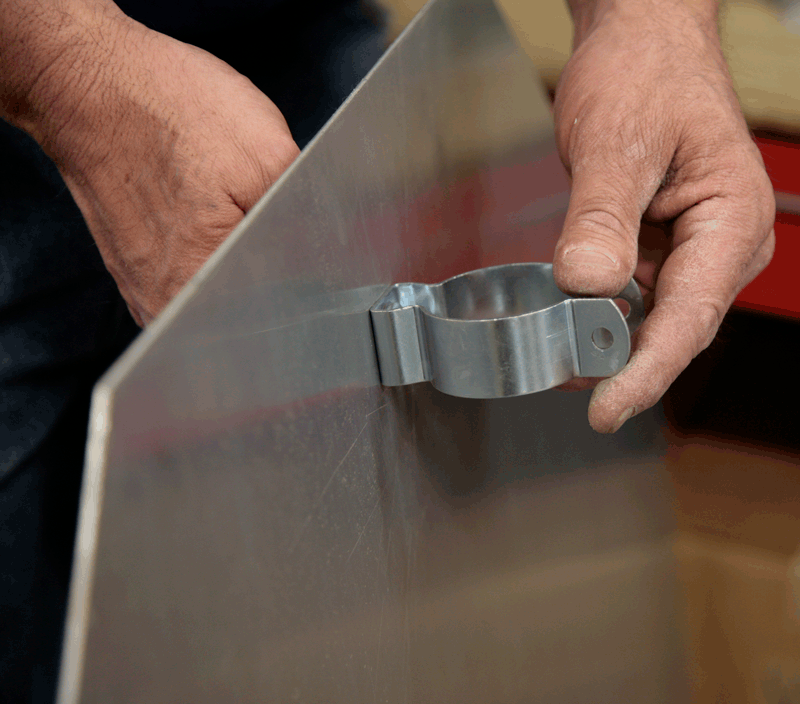
- Step 2
- Mount brackets to back of sign (Make sure threaded part of bolt is facing outwards, as seen on the illustration below)
-
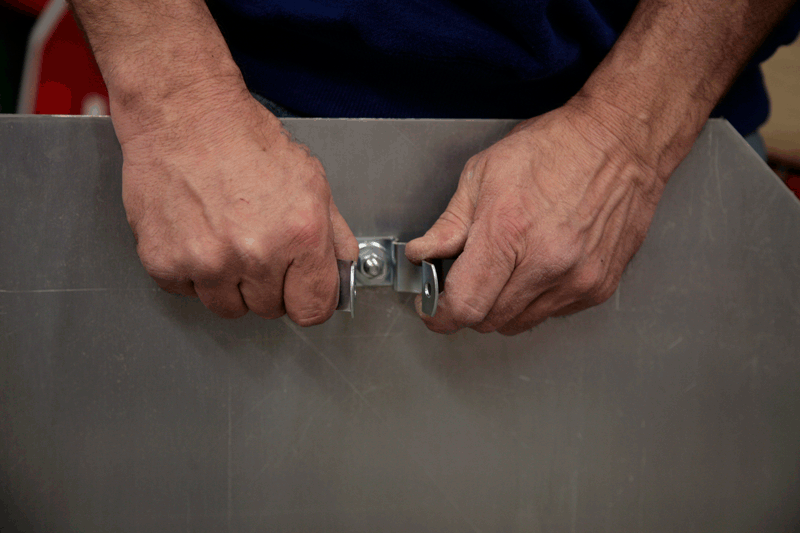
- Step 3
- Widen the opening of the bracket and make sure it wraps around the post.
-
-
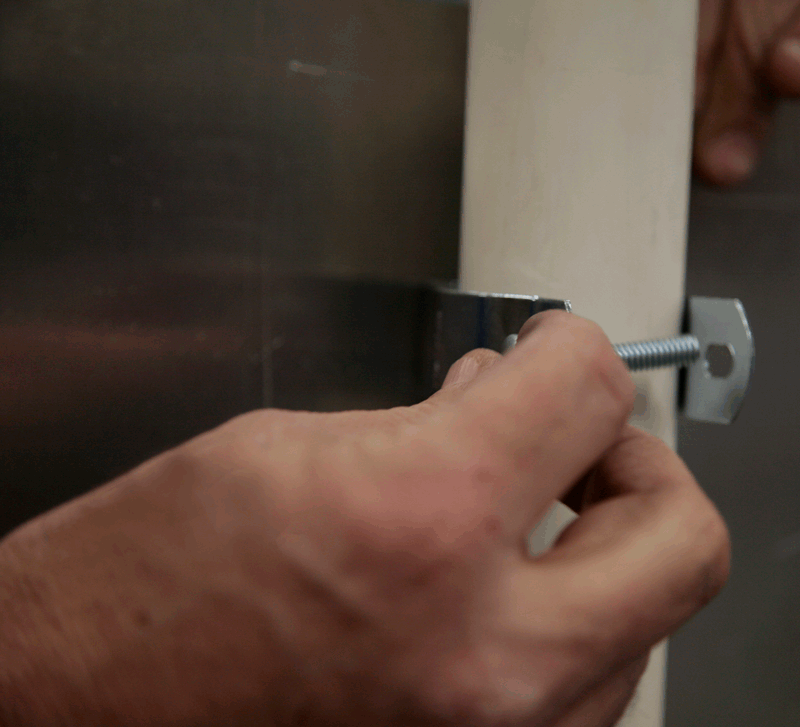
- Step 4
- Tighten with screws supplied.
-
-
-
Octagon Rubber Base + PVC Post Assembly
OCTAGON BASE 30 and 60 Lbs. Assembly Instructions
